How to Enable Classic Windows 7-like Boot Menu in Windows 10
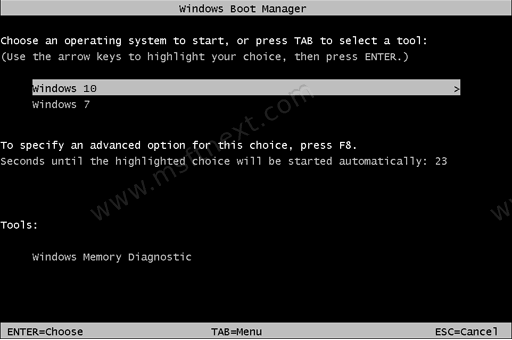
If you switched to Windows 10 from Windows 7, you probably noticed the new boot loader of Windows 10. It looks like a half-loaded Windows OS, and acts completely different. For example, if you have a dual-boot configuration with a previous Windows version, it performs an additional reboot every time you select Windows 7/Windows 8 in the boot menu. You can enable the legacy Windows 7-like boot menu in Windows 10 to avoid extra restarts and restore the classic behavior.
If you get rid of the new boot manager of Windows 10, then instead of the fancy new graphical boot loader you will get the classic text-based boot menu which shows a list of installed OSes.
This can be changed with bcdedit. BCDEdit is a command-line tool for managing Boot Configuration Data (BCD). It was first introduced in Windows 8. BCD files provide a Registry-like data that is used to describe boot applications and boot application settings. BCDEdit can be used for a variety of purposes, including creating new stores, modifying existing stores, adding boot menu options, changing boot defaults, renaming boot entries, and so on.
Note: A normal shutdown and reboot is necessary to ensure that any modified BCDEdit settings are flushed to disk.
To Enable Classic Windows 7-like Boot Menu in Windows 10
- Open the command prompt as Administrator.
- Type the following in the command prompt you just opened:
bcdedit /set "{current}" bootmenupolicy legacy. - Restart Windows 10 to check it out.
That’s it!
You can restore the default boot loader later at any moment. Do the following.
Restore the Default Boot Loader in Windows 10
- Open the command prompt as Administrator.
- Type the following in the command prompt you just opened:
bcdedit /set "{current}" bootmenupolicy standard. - Restart Windows 10 to check it out.
By the way, the same trick works in Windows 8.1 and Windows 8.
