How to Find If You Have GPT Partition or MBR Partition in Windows 10
Finding out if you have MBR or GPT partition on your Windows 10 device can be useful if you want to install an older operating system that does not support GPT. Also, you might want to turn off UEFI in your BIOS firmware, so it have to work with MBR. This blog post explains the steps in detail.
Master Boot Record (MBR) disks use the standard BIOS partition table. GUID Partition Table (GPT) disks use Unified Extensible Firmware Interface (UEFI). One advantage of GPT disks is that you can have more than four partitions on each disk. GPT is also required for disks larger than two terabytes (TB).
MBR was first introduced with IBM PC DOS 2.0 in 1983. MBR only works with disks up to 2 TB in size. MBR also only supports up to four primary partitions—if you want more, you have to make one of your primary partitions an “extended partition” and create logical partitions inside it. This looks a bit outdated in 2020.
GPT has no MBR’s limits. GPT-based drives can be much larger, with size limits dependent on the operating system and its file systems. GPT also allows for a nearly unlimited number of partitions, which is limited by the OS only. You don’t have to create an extended partition to host them.
To find if you have MBR or GPT, all you need is the built-in tool called Disk Management. The fastest way to access the Disk Management app is Win + X menu in Windows 10.
To Find If You Have GPT Partition or MBR Partition in Windows 10,
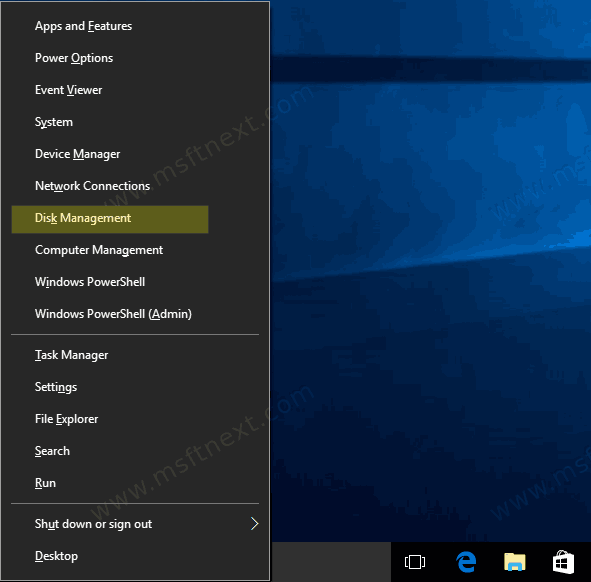
- Right click the Start button. Instead of the context menu of the taskbar, Windows 10 shows Win + X menu. Or, press Win + X shortcut keys together on the keyboard.
- Select the Disk Management item.
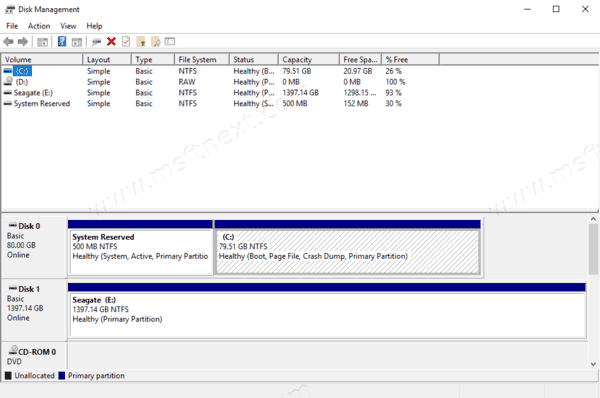
- The Disk Management app will open.
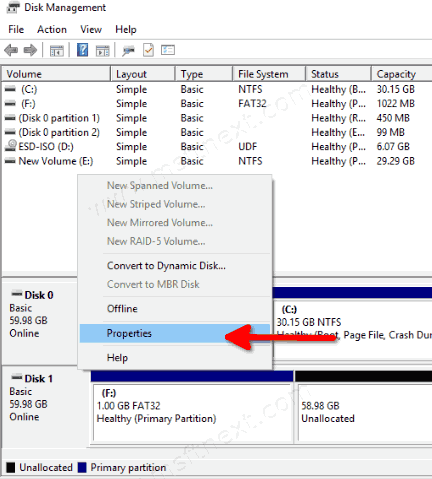
- Right-click the system drive and select ‘Properties’ from the context menu.
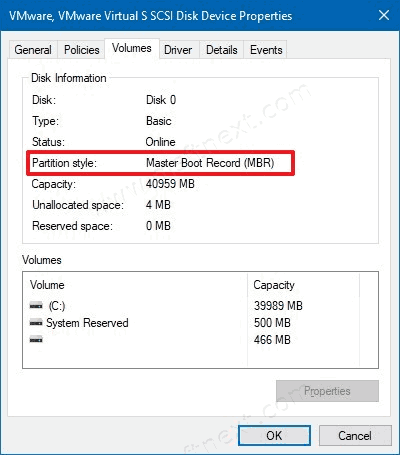
- In ‘Properties’, go to the ‘Volumes’ tab. There you will find the required info.
For MBR drive:
For GPT drive: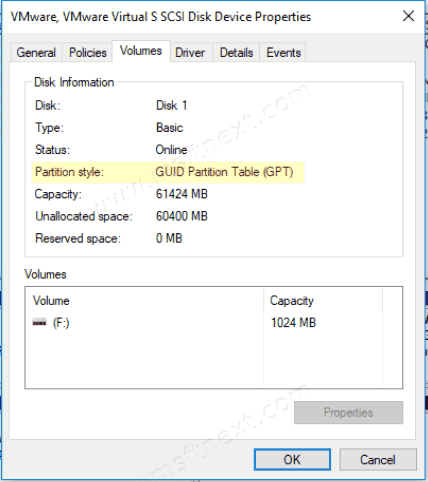
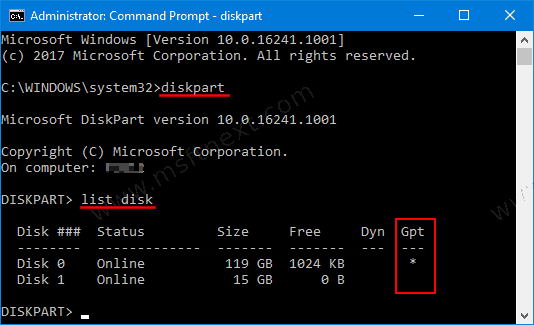
Alternatively, the command line tool diskpart can be used to see if you have GPT or MBR disk type.
- Open the Command Prompt as Administrator.
- In the command prompt, type following commands one by one, pressing Enter after each.
diskpart
list disk - This will list all your disks. For disks that use GPT, it shows an asterisk character (*) under the GPT column.
