The more applications you install in Windows 10, the longer it will take to start up the operating system. This is because many apps load at startup and slow down the startup process. This post explains a number of essential ways to manage startup apps in Windows 10.
In Windows 10, you can manage startup options for both Store and classic (desktop) apps. We will review both methods.
The popular method to manage startup apps is the Task Manager app. Let’s start with it.
Manage Startup Apps In Windows 10
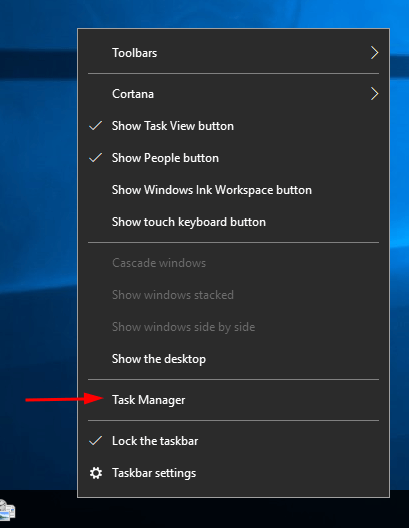
- Open Task Manager. You can press the Ctrl + Shit + Esc keys or right-click the taskbar.
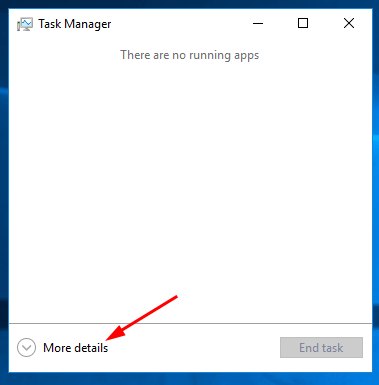
- In Task Manager, click on ‘More details’ to switch to the extended view.
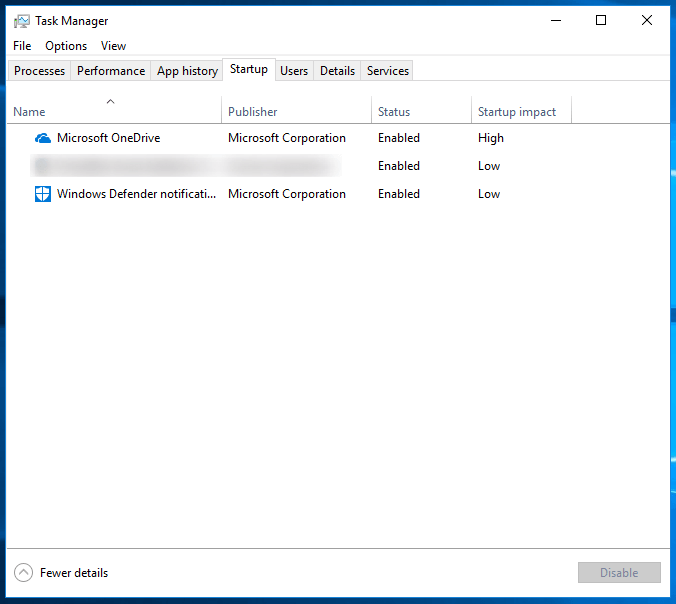
- Switch to the ‘Startup’ tab.
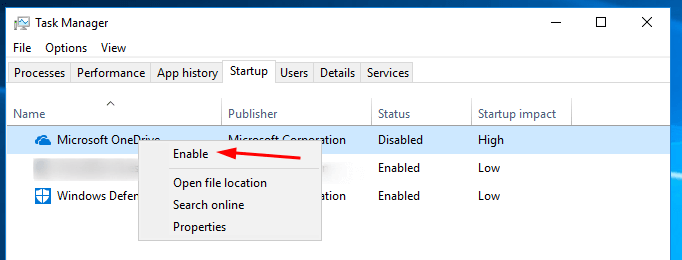
- Right-click on the desired app entry and select ‘Disable’ from the context menu. This will stop the selected app from starting with Windows.
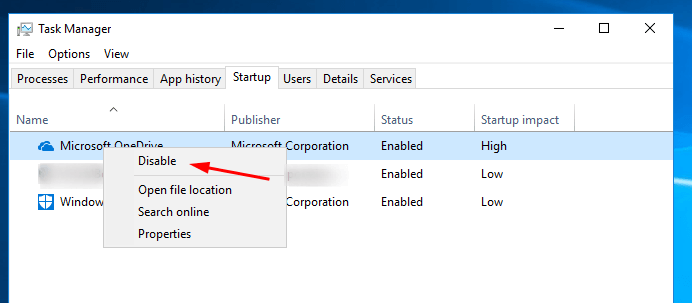
- To enable a disabled startup app, right-click it and select ‘Enable’ in the context menu.
You can open the Startup app of Task Manager directly. Read this post:
Shortcut to Open Task Manager Startup Tab Directly
Task Manager shows startup entries for both the OS and the current user. Startup entries are stored usually at two locations – the registry and the ‘Startup’ folder.
The Startup folder is a useful way to quickly add or remove apps from the startup. There are two Startup folders in Windows 10.
The current user’s Startup folder is located under
C:\Users\you user profile name\AppData\Roaming\Microsoft\Windows\Start Menu\Programs\Startup
Shortcuts located here will start apps automatically for the current user only.
Also, there is a system Startup folder. It can be found under the following location:
C:\ProgramData\Microsoft\Windows\Start Menu\Programs\StartUp
Shortcuts placed here will be started automatically for every user.
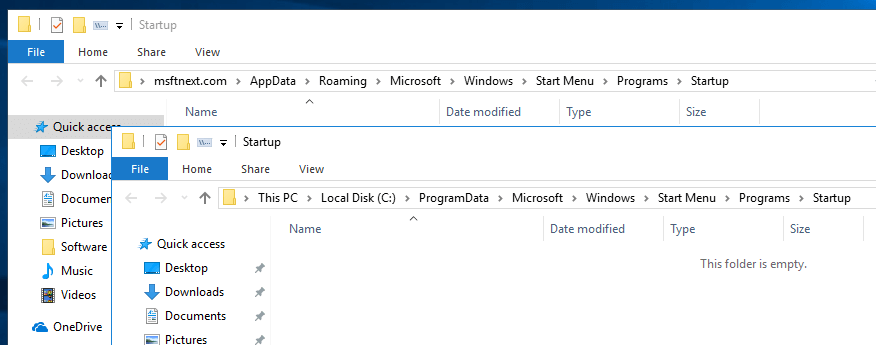
Add or remove apps from the Startup folder
- Press the Win + R keys and type in the Run text box:
shell:Startup. - Hit the Enter key.
- File Explorer will open directly to the Startup folder.
- Put here shortcuts for apps you need to start automatically with the OS.
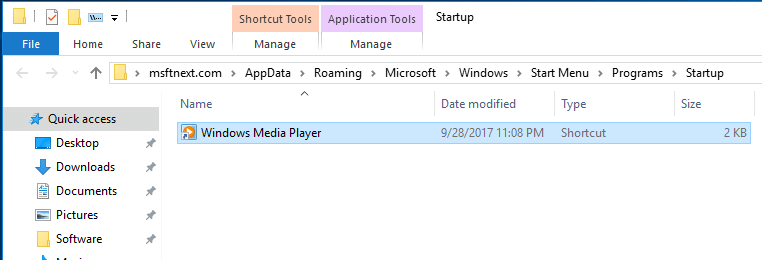
- Remove the desired shortcuts to remove their apps from the startup.
Note: The shell:startup is a special Shell command available in Windows 10. It opens the Startup folder for the current user. Refer to the full list of shell commands to learn more about them.
To open the system Startup folder quickly, use the shell command shell:Common Startup.
Now, let’s see how to manage startup apps using the Registry.
Add or remove apps from the Registry
Firstly, let’s see how to add or remove apps for the current user.
- Open Registry Editor.
- Go to the following key:
HKEY_CURRENT_USER\Software\Microsoft\Windows\CurrentVersion\Run
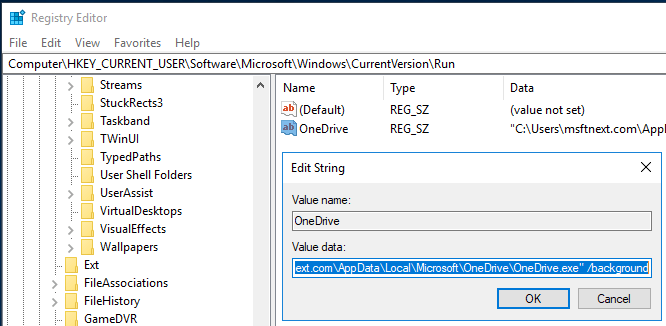
- There you will see startup entries for the current user. To delete an entry, right-click on its row and choose ‘Delete’ in the menu.

- To add a new startup entries, create a new string value with any name you want and set its value data to the full path of the executable file which you want to load at startup.
How to manage startup apps in the Registry for all users
As for the all users case, you need to perform modifications described above under the next Registry key:
HKEY_LOCAL_MACHINE\SOFTWARE\Microsoft\Windows\CurrentVersion\Run
Here you need to create or delete string values for each app. Again, the value name can be anything but the value data must contain the full path to the EXE file of the app that you would like to run at startup.
Manage Startup Options for Store Apps
Starting in Windows 10 build 17017, there is a special page in Settings to manage startup apps. You can find it under Settings – Apps – Startup.
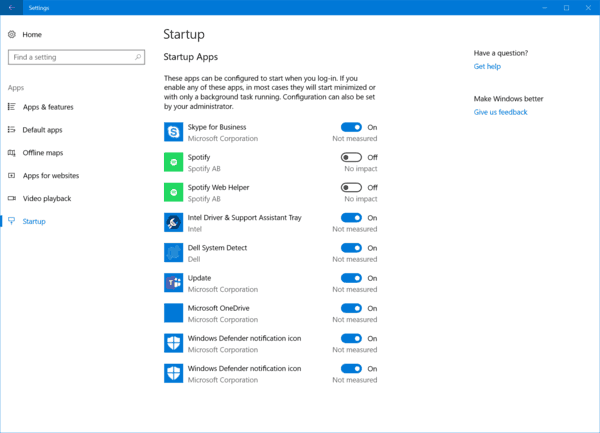
Use the toggle options next to app names to allow or prevent Store apps from starting with the operating system.

There is a 3rd registry location that I had to hunt down to remove some programs I no longer wanted. (A couple of which were uninstalled, so the startup list just lists them unhelpfully as “Program”.) It can be found here:
HKEY_LOCAL_MACHINE\SOFTWARE\WOW6432Node\Microsoft\Windows\CurrentVersion\Run